Roof Repair When You Need It Most
Fast response, lifetime warranty on every repair, and a 4.9-star rating from 293 homeowners. Owens Corning Platinum Preferred Contractor.
4.9 stars / 295 Google reviews | Owens Corning Platinum Preferred Contractor | 30+ Years | BBB A+ Accredited Since 2001
WARNING SIGNS
Signs you need a roof repair
Catching these early saves thousands on a full replacement down the road:
- Water stains on your ceiling or interior walls
- Missing, cracked, or lifted shingles visible from the ground
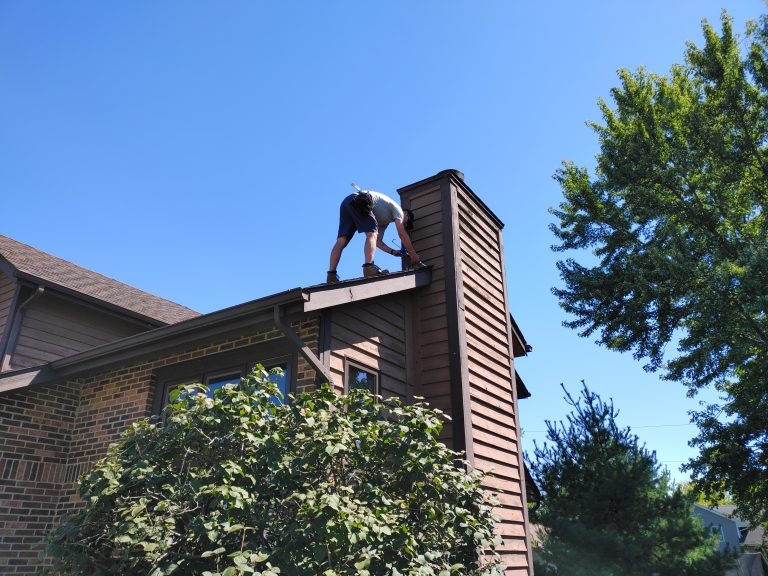
- Flashing pulling away from your chimney or vent pipes
- Granules piling up in your gutters or at the bottom of downspouts
- A slow drip in your attic after heavy rain
- Mold or mildew smell in your attic or upper floors
- Light visible through the roof boards when you are in the attic
- Sagging areas on your roofline when viewed from the street
If any of these sound familiar, call (937) 746-7377. We can usually diagnose in one visit.
WHY CHOOSE US
Why Rembrandt Roofing & Restoration
for Roof Repair

Same-Visit Repairs: We carry flashing, pipe boots, and matching shingles on every truck. Most repairs finished in one visit.
Lifetime Workmanship Warranty: Written warranty on every repair. If it fails, we come back at no cost.
Honest Assessment: If a repair will hold, we say so. We do not push replacements when a $400 fix solves the problem.
Dedicated Repair Crew: Rico, Martin, and Ash handle repairs full-time. They do three times the repair volume of replacements.
Brand Row: Owens Corning Platinum Preferred Contractor
OUR PROCESS
From Call to Clean-up
Call Us
Call (937) 746-7377 or fill out the form. For active leaks, we prioritize your call.
On-Site Diagnosis
A repair technician inspects the damage, identifies the root cause, and photographs everything.
Written Estimate
You get an exact price before any work starts. No hourly billing, no surprise charges.
Repair and Verify
We make the repair, test it with water if applicable, and clean up before we leave.
SERVICES WE OFFER
Roof Repair services we offer in Greater Dayton
Cracked, lifted, or missing shingles replaced with color-matched materials.
Chimney flashing, step flashing, valley flashing, and wall flashing resealed or replaced.
Cracked or dried-out rubber pipe boots are the number one cause of slow roof leaks in Ohio.
Shingle and underlayment damage from ice dams along eaves, including proper ventilation fixes to prevent recurrence.
Ridge cap shingles that have blown off or cracked, exposing the ridge vent beneath.
Rotted or damaged soffit and fascia boards replaced to restore proper attic ventilation and appearance.
Temporary weatherproofing with heavy-duty tarps to stop active leaks until permanent repair is scheduled.
When the leak source is not obvious, we trace it systematically from the attic side to find the exact entry point.
Call (937) 746-7377 or fill out the form above for a free estimate on any of these services.
REVIEWS
Frequently Asked Questions
Most roof repairs in Greater Dayton range from $250 to $1,500, depending on the scope. A single pipe boot or flashing repair is on the lower end. Multiple missing shingles or valley repairs run higher. We provide a free written estimate before any work starts.
Most repairs are completed in a single visit, usually within two to four hours. Complex repairs involving structural damage or multiple areas may require a full day.
Yes. Every repair comes with our Lifetime Warranty on Materials and Workmanship. If a repair we made fails, we come back and fix it at no additional cost.
No. As an Owens Corning Platinum Preferred Contractor, our repairs are performed to manufacturer specifications and will not void your existing OC warranty.
Yes. If you have an active leak or storm damage, call (937) 746-7377 and we will prioritize your job. We carry flashing, pipe boots, and matching shingles on every truck for fast response.
If the damage is isolated to one area and your roof is under 20 years old, a repair is usually the right call. If you have widespread damage, multiple leaks, or a roof past its expected lifespan, replacement is more cost-effective. We give you an honest recommendation during the free inspection.
Yes. We repair asphalt shingle roofs, metal roofs, flat roofs (EPDM, TPO, modified bitumen), slate, tile, and cedar shake. Our repair team has specialized experience across all residential and commercial roof types.
Yes. Financing options are available for qualified buyers. Visit our financing page or ask your project manager during the estimate..
In most cases, yes. We stock common Owens Corning colors and can order specialty matches. Keep in mind that weathered shingles may look slightly different from new ones, which is normal and fades over time.
The most common causes in our area are cracked pipe boots, lifted flashing around chimneys, ice dam damage along eaves, and wind-blown shingles. Ohio's freeze-thaw cycles accelerate all of these failure point.
Don’t see your question? Call us at (937) 746-7377. We answer every call.
Alpha OH | Beavercreek OH | Bellbrook OH | Blanchester OH | Brookville OH | Butlerville OH | Carlisle OH | Centerville OH | Cincinnati OH | Clarksville OH | Cuba OH | Dayton OH | Fairborn OH | Fairfield OH | Farmersville OH | Franklin OH | Germantown OH | Glendale OH | Gratis OH | Hamilton OH | Harveysburg OH | Huber Heights OH | Indian Springs OH | Kettering OH | Kings Mills OH | Landen OH | Lebanon OH | Lewisburg OH | Liberty Township OH | Lindenwald OH | Maineville OH | Mason OH | Mayfield OH | Miamisburg OH | Middletown OH | Midland OH | Monroe OH | Moraine OH | Morrow OH | Mount Holly OH | New Lebanon OH | Oregonia OH | Overpeck OH | Pleasant Plain OH | Riverside OH | Seven Mile OH | Sharonville OH | South Lebanon OH | Spring Valley OH | Springboro OH | Springdale OH | Trenton OH | Trotwood OH | Waynesville OH | West Alexandria OH | West Carrollton OH | West Chester OH | West Elkton OH | Wilberforce OH | Wright-Patterson AFB OH | Xenia OH | Yellow Springs OH
FINANCING
WARRANTY
DISCOUNT
Financing Available
Qualified buyers
Apply online
Lifetime Warranty
on Materials and
Workmanship
In writing on every job
Veteran
First Responder
Discounts
Ready to get your roof repair done right?
Fast response. Free written estimate. Lifetime Warranty on Materials and Workmanship.
4.9 (295) | Owens Corning Platinum Preferred Contractor | 30+ Years | BBB A+ Accredited Since 2001