Flashing is thin metal material—typically aluminum, galvanized steel, or copper—installed at roof intersections, valleys, chimneys, skylights, vents, and walls to direct water away from vulnerable areas and prevent leaks. It creates a water-resistant barrier at points where your roofing materials meet vertical surfaces or change direction. For homeowners throughout Springboro, Mason, West Chester, and surrounding Southwest Ohio communities, properly installed and maintained flashing is critical for roof longevity, as it’s often the first component to fail in both older homes and newer construction.
Understanding Roof Flashing: Your Roof’s First Line of Defense
Think of flashing as the unsung hero of your roofing system. While shingles get most of the attention, flashing does the critical work of protecting the most vulnerable points on your roof—the places where water naturally wants to collect and penetrate. Without proper flashing, even the highest-quality roofing materials will eventually fail, leading to water damage, mold growth, and costly repairs.
Throughout the Dayton metro area, from historic homes in Oakwood to newer subdivisions in Beavercreek and Lebanon, flashing protects roofs from our region’s challenging weather conditions: freeze-thaw cycles that expand and contract materials, humid summers that accelerate deterioration, and occasional severe storms with damaging winds and hail.
Types of Roof Flashing and Their Purposes
Chimney Flashing
Chimney flashing is one of the most complex and critical flashing installations. It typically consists of two layers: base flashing that extends up from the roof surface and counter-flashing that’s embedded into the chimney mortar joints. In Warren and Montgomery County’s older neighborhoods with brick chimneys, deteriorating mortar can compromise counter-flashing, creating leak pathways.
Valley Flashing
Valleys—where two roof planes meet—channel large volumes of water during storms. Valley flashing creates a waterproof channel that handles this concentrated flow. For homes throughout Centerville, Kettering, and Miamisburg with complex roof designs, properly installed valley flashing is essential for preventing leaks during heavy rainfall.
Step Flashing
Step flashing is used where roof planes meet vertical walls, such as dormers or second-story additions. Individual L-shaped pieces are woven with each course of shingles, creating a stepped barrier. This type commonly fails in homes built during the 1990s-2000s construction boom if installers cut corners during the original installation.
Vent Pipe Flashing
Plumbing vents, exhaust vents, and other roof penetrations require specialized boot-style flashing. The rubber gaskets on these flashings typically deteriorate after 15-20 years of exposure to Southwest Ohio’s temperature extremes, making them a common source of leaks in homes throughout the region.
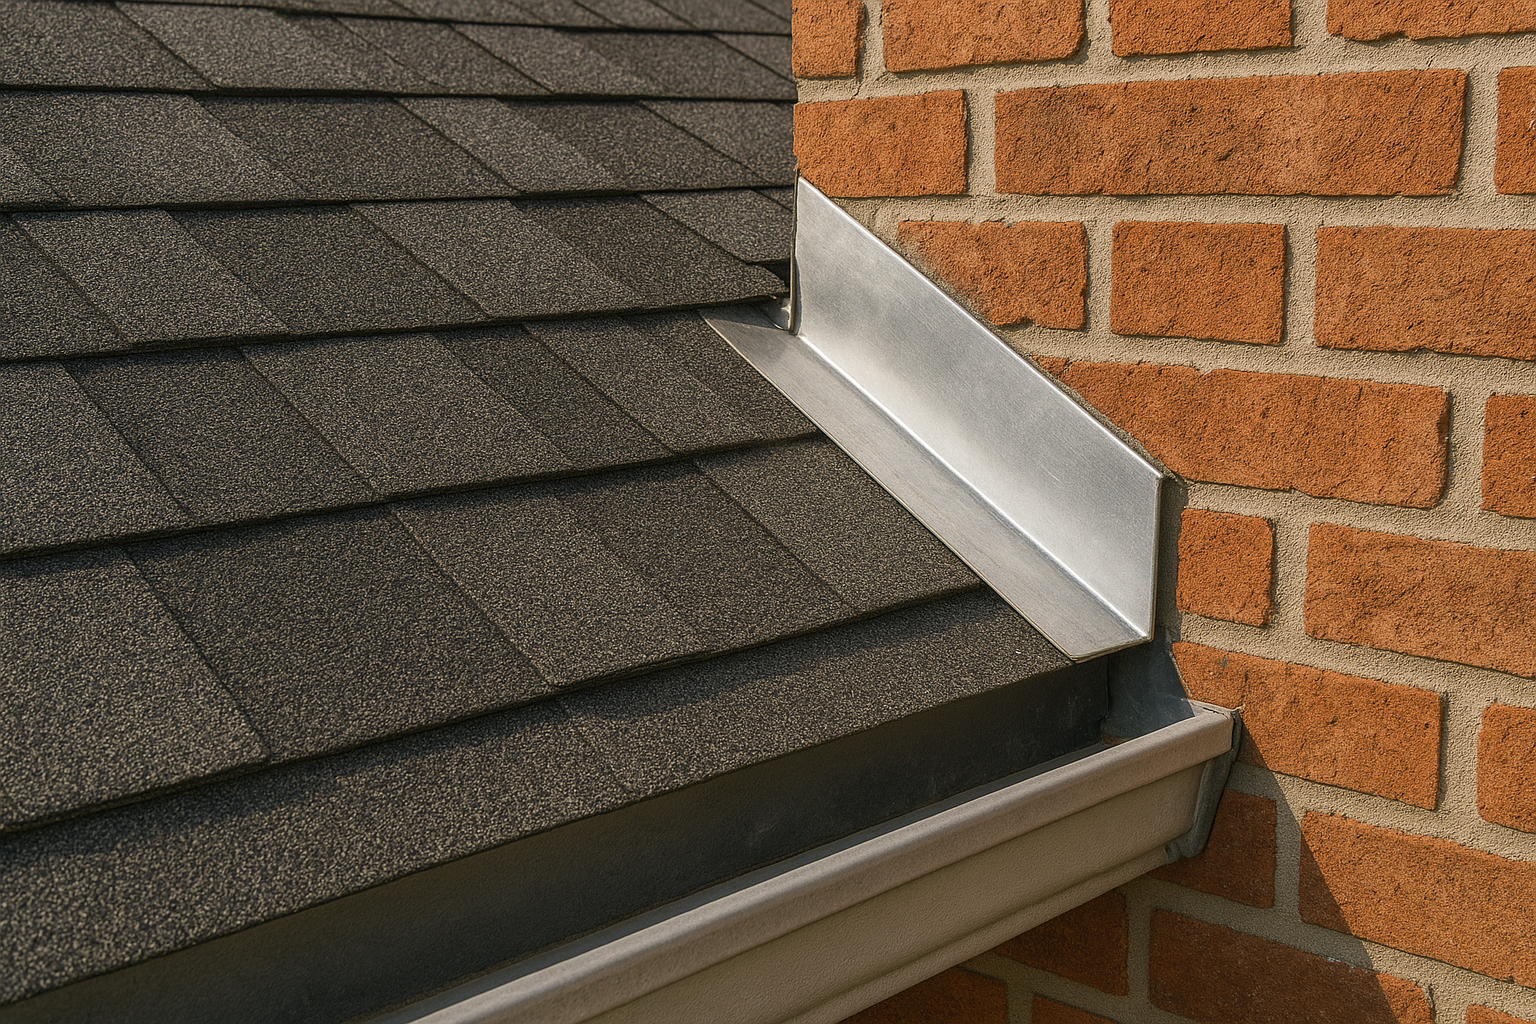
Drip Edge Flashing
Installed along roof edges, drip edge flashing directs water away from fascia boards and into gutters. While seemingly minor, missing or improperly installed drip edge can lead to rotted roof decking and fascia damage—a problem we frequently see during storm damage inspections for insurance claims.
Why Flashing Fails: Common Problems in Southwest Ohio
Weather-Related Deterioration
Southwest Ohio’s freeze-thaw cycles are particularly hard on flashing. Water infiltrates small gaps, freezes, expands, and gradually widens openings. Over years of seasonal temperature swings, even quality flashing installations can develop leaks. High winds during severe weather can also lift flashing away from surfaces, especially around chimneys and roof edges.
Improper Installation
Unfortunately, flashing installation errors are extremely common. We regularly encounter roofs in Butler County and throughout the Dayton area where flashing was inadequately sealed, incorrectly layered with shingles, or simply omitted at critical locations. These installation shortcuts may not cause immediate problems but inevitably lead to leaks within a few years.
Age and Material Degradation
Aluminum flashing typically lasts 20-30 years, while galvanized steel can rust through in similar timeframes. Homes built in the 1970s-1990s throughout Springboro, Mason, and West Chester are reaching the age where original flashing needs replacement, even if shingles still appear serviceable.
Signs Your Flashing Needs Attention
Watch for these warning signs that indicate flashing problems:
- Water stains on ceilings or walls, especially near chimneys, skylights, or exterior walls
- Missing or bent flashing visible from ground level
- Rust spots or holes in metal flashing
- Loose or cracked caulking around flashing seams
- Damaged or missing shingles near flashing areas
- Interior moisture or musty odors in the attic space
If you notice any of these issues, prompt inspection can prevent minor flashing problems from becoming major water damage situations.
Flashing Replacement: What to Expect
When Flashing Needs Replacement
Flashing should be replaced when you install a new roof, as reusing old flashing is false economy that often leads to callbacks and leaks. However, flashing sometimes needs replacement independently if it’s damaged by storms, deteriorates prematurely, or was improperly installed originally.
The Replacement Process
Professional flashing replacement involves carefully removing surrounding shingles, installing new flashing with proper overlapping and sealing techniques, and integrating the flashing correctly with your roofing materials. For chimney work, this may also require tuckpointing mortar joints—a common need in older homes throughout Bellbrook, Oakwood, and established Dayton neighborhoods.
Cost Considerations and Insurance
Isolated flashing repairs typically cost $200-$500, while comprehensive flashing replacement during a full roof installation adds $500-$2,000 depending on roof complexity. When storm damage is involved—common throughout Southwest Ohio—properly documented flashing damage can often be included in insurance claims. Working with a roofing contractor experienced in insurance processes ensures you receive fair compensation for necessary repairs.
Protecting Your Investment: Maintenance Tips
Regular inspections are your best defense against flashing failures. Have your roof professionally inspected every 2-3 years, and always after severe weather events. Between professional inspections, visually check accessible flashing areas for obvious damage, rust, or separations.
Keep gutters clean, as clogged gutters can cause water backup that tests flashing seals. Trim overhanging branches that can scrape flashing during windstorms. And if you notice any signs of leaks, address them immediately—water damage compounds quickly once it starts.
Professional Installation Makes All the Difference
Flashing installation requires specialized knowledge, proper materials, and meticulous attention to detail. While it represents a relatively small percentage of total roofing material costs, flashing installation quality determines whether your roof will last its expected lifespan or fail prematurely with costly leaks.
For homeowners throughout Warren, Montgomery, and Butler Counties, choosing an experienced roofing contractor familiar with local weather challenges and building practices is essential for long-lasting flashing performance.
Protect Your Home with Expert Flashing Installation
Your roof’s flashing is too important to leave to chance. Whether you’re concerned about existing flashing, planning a roof replacement, or dealing with storm damage, Rembrandt Roofing brings the expertise Southwest Ohio homeowners need for reliable, leak-free roofing systems.
Contact Rembrandt Roofing today at https://rembrandtroofing.com for a comprehensive roof inspection. Serving Springboro, Centerville, Dayton, Mason, West Chester, and all surrounding communities, we’ll evaluate your flashing condition, explain your options, and provide honest recommendations to protect your most important investment—your home.